Easter and Spring Break are almost here! So, we created this cute project in order to combine the these two occasions. These Easter baskets will keep the kids entertained for some time, create fun bonding moments, and can be used on Easter day to go egg hunting! They can also be used to add some decor to your family gathering.
 Create you own by following these instructions:
Materials
Best Creation Glitter Cardstock Papers (GCS067, GCS065, GCS066)
Best Creation Basic Glitter papers (BGP202, BGP204, BGP201)
Foam Tape FT001
6 Brads
Print-n-Cut Design
Tools
Ruler
Glue
Bone folder
Rotary Trimmer 17”
Scissors or cutting machine
Best Creation Glitter Cardstock Papers (GCS067, GCS065, GCS066)
Best Creation Basic Glitter papers (BGP202, BGP204, BGP201)
Foam Tape FT001
6 Brads
Print-n-Cut Design
Tools
Ruler
Glue
Bone folder
Rotary Trimmer 17”
Scissors or cutting machine
 |
| Step
1. Cut the
Glitter Cardstock Papers GCS067
(Hot Blue), GCS065 (Hot Pink), & GCS066 (Yellow) using your cutting machine or scissors (6x6" each). |
 |
| 6x6" sheet |
 |
| Step 2. Score the layer using a bone folder.
(Refer
to the graphic = score at 2” for each side).
|
 |
|
Step 3. Cut the 4 corners, like the graphic.
|
 |
| Step
4. Round the corners of each sheet
(Refer to graphic). |
 |
| Step 5. Fold the ends together to form the base of the basket. Then, punch a small hole on the sides, as shown in the photo. This is where the brads will go. |
 |
| Step 6. Cut out the basket handles using the 3 Glitter Cardstock
Papers into a 1 x 8½" size. You can use cutting machine or scissors. |
 |
| Step 6A. Place the handles on each basket base, starting from the side with the hole punch to the next side. Insert the brad on each side to hold it all together. (The brad on the photo had a flower design in the front, but you can use any brad without design, too). |
 |
| This is what the inside will look like once the brads are inserted. |
 |
| Step
7. Cut out the Basic Glitter Papers to decorate the basket base and handle.
Use fabric glue to attach the Basic Glitter Papers to the Glitter Cardstock papers.
|
 |
| Step 7A. Hole punch again once the Basic Glitter papers
are attached,
and re-insert the brads on each side.
|
 |
| Step
8. Decorate the basket as you like. |
 |
| We cut out a scalloped circle shape and attached it to the front of the basket using our Foam Tape FT001. You can cut this same shape or a different one, such as a heart or a plain circle. You can print the cut-n-print images you want and attach those using Foam Tape or fabric glue. |
 |
| You can change up the colors and choose the cut-n-print images to fit the occasion. |
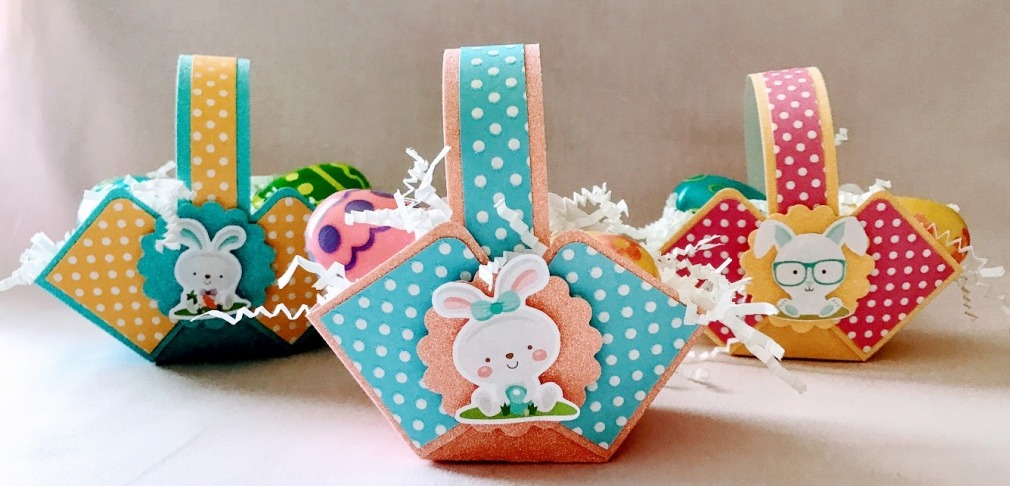
This is our finished product!


You can even use these as party favors or decorations and change up the colors and designs to fit different themes.
We hope you enjoyed making this! Send us your finished baskets, or post them on your social sites and tag us!
Comments
Post a Comment