We asked our Design Team to share some of their favorite techniques that
they like to do on their pages and it just may be the perfect idea
to get those pages you have put away done finally and in your
book or on the wall..... We hope you get inspired!!!
they like to do on their pages and it just may be the perfect idea
to get those pages you have put away done finally and in your
book or on the wall..... We hope you get inspired!!!
 |
| Deep in the Woods by Irit Shalom |
pages with twine and tie them off in the corners.
It makes the perfect border for a page!
 |
| "Dream come True" by Jona Panesa |
Jona says she loves fussy cutting and so happy that Best Creation
has great images to cut and use as embellishments.
supplies:
Patterned paper: Bella GDC114, GP465, GP466, GP467, GP464
flowers: prima and inkido, brad: inkido, all about scrapbooking
Alpha: cosmo cricket, Glue; Helmars and zap dots
thread: DMC floss for crochet doily and flower

 |
| "The Great Backyard" by Liz Chidester I used a cool technique that I recently discovered. I used ordinary white string and colored green stripes on it with a marker to make it look like baker's twine. Its very easy to do and super cheap. |

 |
| I love Ballet by Katarina Damm |

supplies:
BP014, BP012, BP013 BP007 BP002 BP003 BP005As for the technique I have folded a paperfan out of a borderpunched
stripe of paper, and I have made small paper roses to go with that :)
it's a really fun idea to add to simple chipboard shapes and really
jazz them up for your cards and pages.

1) I like using wallet size photos on some of my pages, however my photofinishing
store does not offer wallet size, and the other one prints the same photo
4 times (which is a waste for me :)) Using photoshop elements, I open
a blank 4X6 canvas, make 4 different rectangles (on different layers,
the paint holds it in place) and then drag and drop in my photos.
Save as a jpeg, and then send it off to be printed for the cost of 1- 4X6.
4 times (which is a waste for me :)) Using photoshop elements, I open
a blank 4X6 canvas, make 4 different rectangles (on different layers,
the paint holds it in place) and then drag and drop in my photos.
Save as a jpeg, and then send it off to be printed for the cost of 1- 4X6.

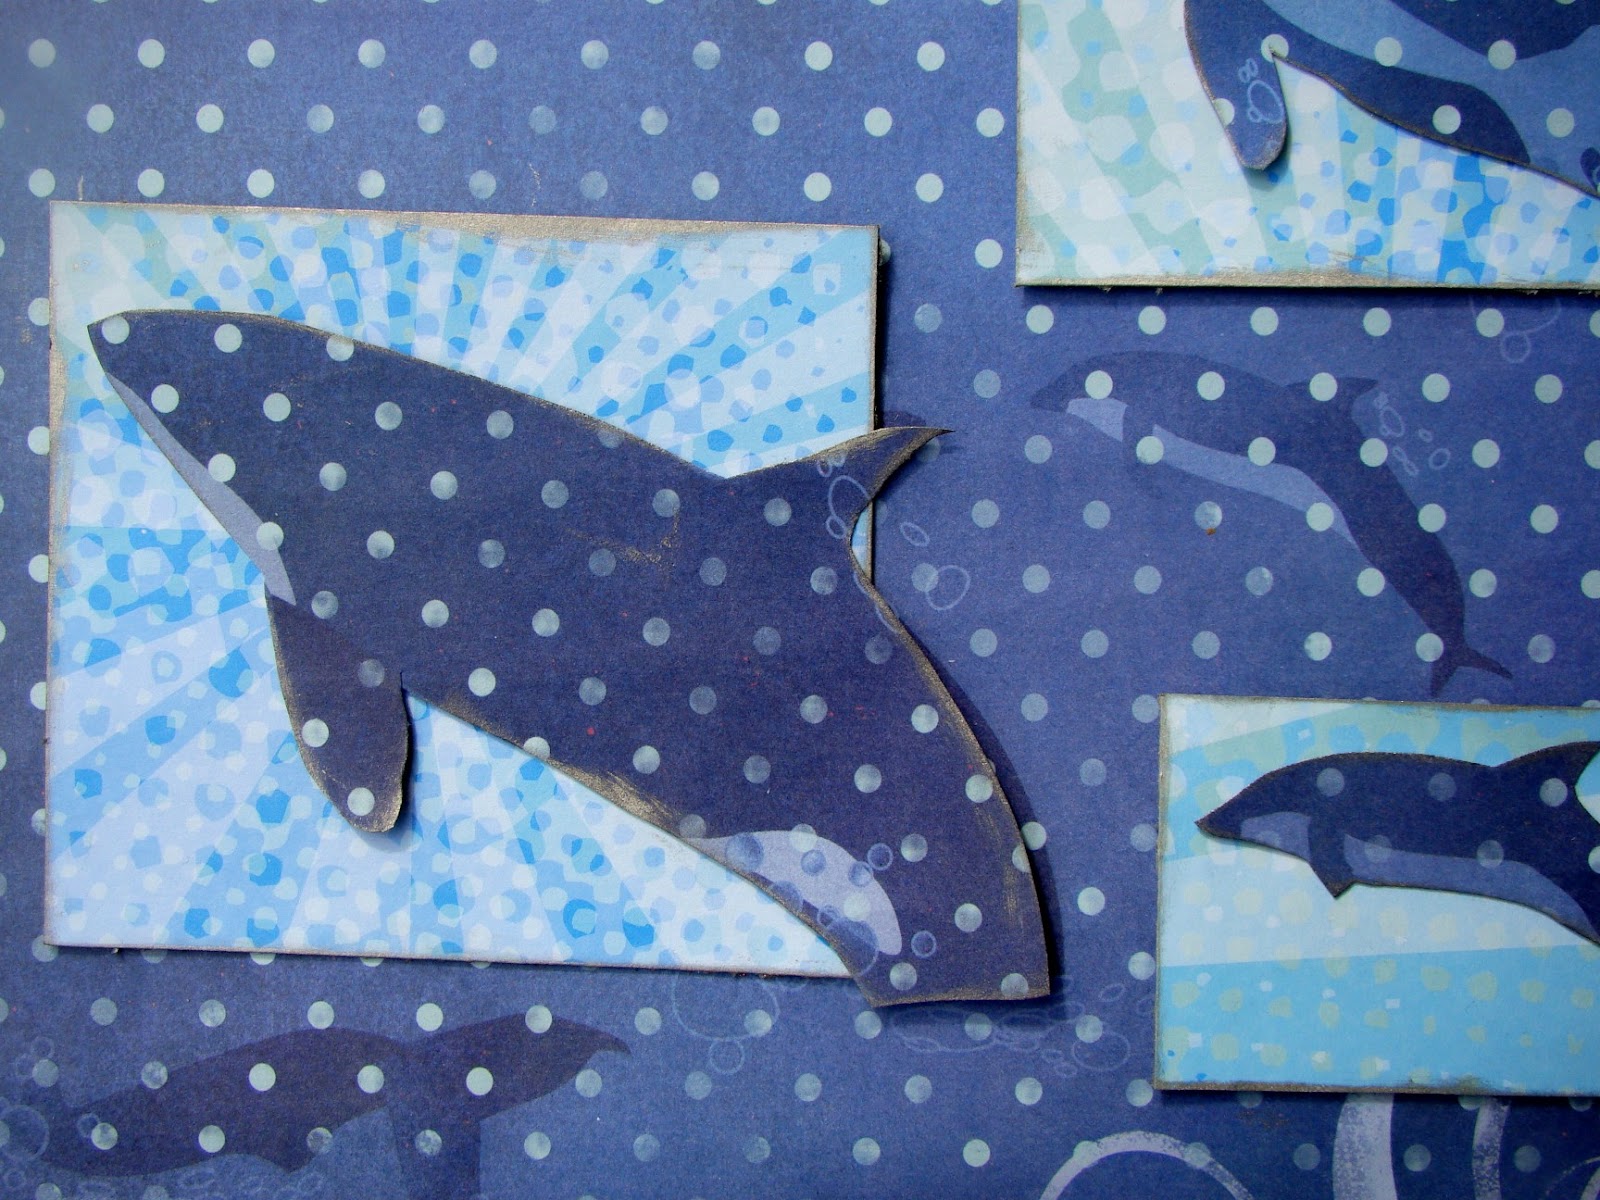
2) The orca whales at the bottom of the layout are part of the background pp.
They fit beautifully with my layout, but I wanted them to stand out a bit more.
So I cut them out, placed a lighter piece of pp behind them and then attached them again.
If you have two of the same pp you can cut from one and then just adhere on top.
Its a great way to emphasize an element in the background pp.
 |
| Ray of Sunshine by Brittny Kilvaug |

 |
| Baseball is Life by Julie Walton |

One technique that I turn to more often than not is to hand stitch.
I love the uneven not perfect look to handstitching on a layout so
I am not precise and dont use any measurements.
I usually turn to this technique when my layout just
needs a little something and it usually completes the
layout. I also have a pet peeve about naked buttons:
the holes are there for a reason..put some thread/floss/string
in them!!! I love my floss, needle and needle punch..
.they are my best friends :)
layout. I also have a pet peeve about naked buttons:
the holes are there for a reason..put some thread/floss/string
in them!!! I love my floss, needle and needle punch..
.they are my best friends :)
Supply List:
Papers - BB001, BB006, BB009 (Baseball), Glitter Cardstock - GCS014
Chipboard - BB014 (Baseball) Alpha's - October Afternoon, Bella Blvd
Punch (star) - Ek Success, Pen - Uniball , Buttons - Epiphany Crafts
Chipboard - BB014 (Baseball) Alpha's - October Afternoon, Bella Blvd
Punch (star) - Ek Success, Pen - Uniball , Buttons - Epiphany Crafts


“Searching for the Perfect Tree” Layout Cardstock: (Kraft). (Vintage Cream) Papertrey Ink. Patterned Paper: (GC002, GC008, GC006, GC001, GC009, GC003,GC007 from Gone Camping collection) Best Creation. Fibers: (Brown striped ribbon). (Brown Jute twine) May Arts. Clear Stamp: (Ticket, ledger) Tim Holtz. (Rectangles from Button Boutique set) Papertrey Ink Dye Ink: (Rhubarb Stalk, Rich Cocoa, Bamboo Leaves) Tsukineko. Accents: (Red alphabet stickers) American Crafts. (Red & white letter stickers, green and white stickers from Tinsel and Twig collection) The Girl’s Paperie. (Tape) Vintage Street Market. Other: (Border edge punches) Martha Stewart. (Heart punches) Fiskars. 1. Trim patterned paper. Punch hearts from patterned paper. Adhere to cardstock with tape. Adhere photo. 2. Stamp rectangles. Ledger and tickets on cardstock. Trim tickets and adhere to cardstock. 3. Trim journaling tags and adhere. Adhere stickers to spell sentiments. Fussy cut trees, trim and adhere to cardstock. Punch hearts from patterned paper, fold in half and stich to center of negative punch-outs. 4. Thread word stickers with twine and adhere with foam tape. Adhere ribbon and tape. TECHNIQUES USED: -Using tape as a rustic accent -Drawing interest to negative punch-outs with stitched punch-outs. -Getting creative with stickers by adhering with foam tape, or trimming in half.  
Just perfect for the paper tole technique. This is where an image is raised above the surface to give a three dimensional effect. For these cards I cut out balloons, hat and flag from the second paper and placed them on top of the first paper with pop dots. They literally appear to be floating across the sky. I Love America Supplies : Giltter Element Stickers #IA012, Combo Stickers #IA013, Expression Chipboard #IA014, 6x6 Glitter Pad #IA016 Others : Basic Grey brad, ribbon |

Cute Cute Cute all of it.
ReplyDeleteGreat techniques!
ReplyDeleteWohoo great techniques there - You Rock!
ReplyDeleteawesome!!!
ReplyDeleteLove everyone's projects and what fantastic techniques...I know I will be trying some of them. BEAUTIFUL work everyone!
ReplyDelete