There is nothing in the world like being out in some
of the Beautiful places in nature on our planet and if
you get the chance to hike, camp, fish, wait for flowers,
or do whatever you do when you are there
we have some great ideas for pages for you!!
or do whatever you do when you are there
we have some great ideas for pages for you!!
 |
| "Great Outdoors" by Debbie Sherman (Wyoming) |

Debbie had a great idea to use half of the mini die cut
for her journaling and a border on the side of the photo.
Supplies:
GC004, GC010, GC002, GC007 Spellbinders S5-040 Floral Doily dies
GC004, GC010, GC002, GC007 Spellbinders S5-040 Floral Doily dies
Prima - Say it in crystals and flowers, other flowers,
Petaloo and Recollections , journal circle - unknown

The picture on this LO was taken when me and my family
and another family went on a photo safari to one of the theme
playgrounds around Malmö (there are several here) this one is from the African Park.
I used the fabulous Gone Camping Line - such soft and beautiful colors
and combined with a few details of Glitter cardstock.
To make the page more interesting
I added some acrylic paint mixed with water.
Supplies:
Best Creation Gone Camping GC002, 001, 003,
007, 016, 013. GCS 004 Red, FT003. Helmar 450 Quick Dry Adhesive
007, 016, 013. GCS 004 Red, FT003. Helmar 450 Quick Dry Adhesive
Other MM acrylic pant , staples , QK alpha, Ranger Crackle accents
 |
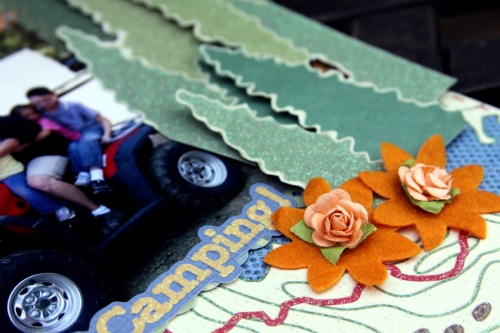
| "You make me so Proud" by Jona Panessa (Philippines) |
Jona wanted to make a special layout about her son with
our new Gone Camping line since baseball is not such
a big deal in the Philippines. She used the diecut a little off the side
for the photo and layered lots of pieces from the new stickers. She used the
Tim Holtz flower die to create the matching flowers for her layout.
our new Gone Camping line since baseball is not such
a big deal in the Philippines. She used the diecut a little off the side
for the photo and layered lots of pieces from the new stickers. She used the
Tim Holtz flower die to create the matching flowers for her layout.
Supplies:
Gone camping - GC009, GC007, GC004, GC010
glitter cardstock - GCP216
alpha sticker GC013, Scenic route alpha
inkido flowers, misc. lace
 |
| "April showers/please send flowers" by Tracey Taylor (Canada) |
Tracey lives in Canada where the weather can get to 35 degrees
below zero so this page is so fitting to do as
spring slowly appears this year for her and her family.
below zero so this page is so fitting to do as
spring slowly appears this year for her and her family.

buttons that have a design to the already embossed glittery flowers.
Adding details like this makes the page more interesting and less flat.
Magistical Memories Chipboard flowers
My Little Shoebox Glitter Letter Stickers
American Crafts Thickers, Sizzix Snowflake Die
Misc. white buttons, DCWV Scalloped cardstock
 |
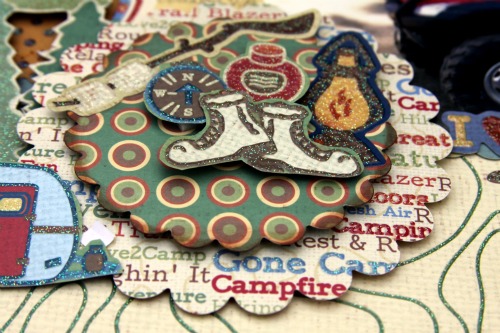
| "Hello Fall" by Karen Thind (Canada) |
page with her Spellbinders dies. She used bands of the paper
to create a backround and then used all different patterns to cut
all the circles out. The tiny word stickers went perfect
layered on top of them and some extra matching buttons
and all she needed was a darling photo of her daughter
and a cute title also made with a Spellbinders die.

supplies: Circles/scallop circles/bracket frames all cut using Spellbinders
cardstock: GC001, GC002, GC003, 004,005,006, 014
 |
| Beach Bums by Tracey Taylor (Canada) |
Beach Bums Layout:
Gone Camping (GC010, GC012, GC013, GC014)
Maya Road envelope, Bo Bunny Chipboard Words
Bazzill Borders
Gone Camping (GC010, GC012, GC013, GC014)
Maya Road envelope, Bo Bunny Chipboard Words
Bazzill Borders
 |
| Great Outdoors by Kim Holmes (Washington State) I enjoyed combining both patterned paper and stickers to add dimension to my layout – these fabulous papers make it so easy to do fussy cutting! |

 |
| Great Outdoors by Karen Taylor (Missouri) |
The Great Outdoors Layout:
Patterned Paper: Best Creations: Gone Camping (GC011 and GC003)
Glitter Stickers: Best Creations: Gone Camping (GC012 and GC013)
Expression Chipboard: Best Creations: Gone Camping (GC014)
Glitter Paper Pad: Best Creations: Gone Camping (GC016)
Glitter Cardstock: Best Creations: Coffee (GCS031)
Ink: Clearsnap ColorBox Chalk Ink (Chestnut Roan)
Kraft Paper: The Paper Studio
So you probably can see that out paper is not just for camping
but you can create lots of different kinds of pages with it
and the colors still go great!! Have a great day and hope you
make something fun today!!
Patterned Paper: Best Creations: Gone Camping (GC011 and GC003)
Glitter Stickers: Best Creations: Gone Camping (GC012 and GC013)
Expression Chipboard: Best Creations: Gone Camping (GC014)
Glitter Paper Pad: Best Creations: Gone Camping (GC016)
Glitter Cardstock: Best Creations: Coffee (GCS031)
Ink: Clearsnap ColorBox Chalk Ink (Chestnut Roan)
Kraft Paper: The Paper Studio
 |
| Hollywood Sign by Karen Thind (Canada) |
So you probably can see that out paper is not just for camping
but you can create lots of different kinds of pages with it
and the colors still go great!! Have a great day and hope you
make something fun today!!
Loving this collection! The DT created such fabulous layouts, thanks for the inspiration!
ReplyDeleteThese are all gorgeous great job once again hats off to the DT
ReplyDeleteGet directions, reviews, payment information on Great Outdoors located at Bucklin, MO. Search for other No Internet Heading Assigned in Bucklin.Experience Missouri's great outdoors just outside your doorstep when you camp in a secluded walk-in sites to sites ready for your camper.
DeleteDon Blankenship