
Warmest Wishes


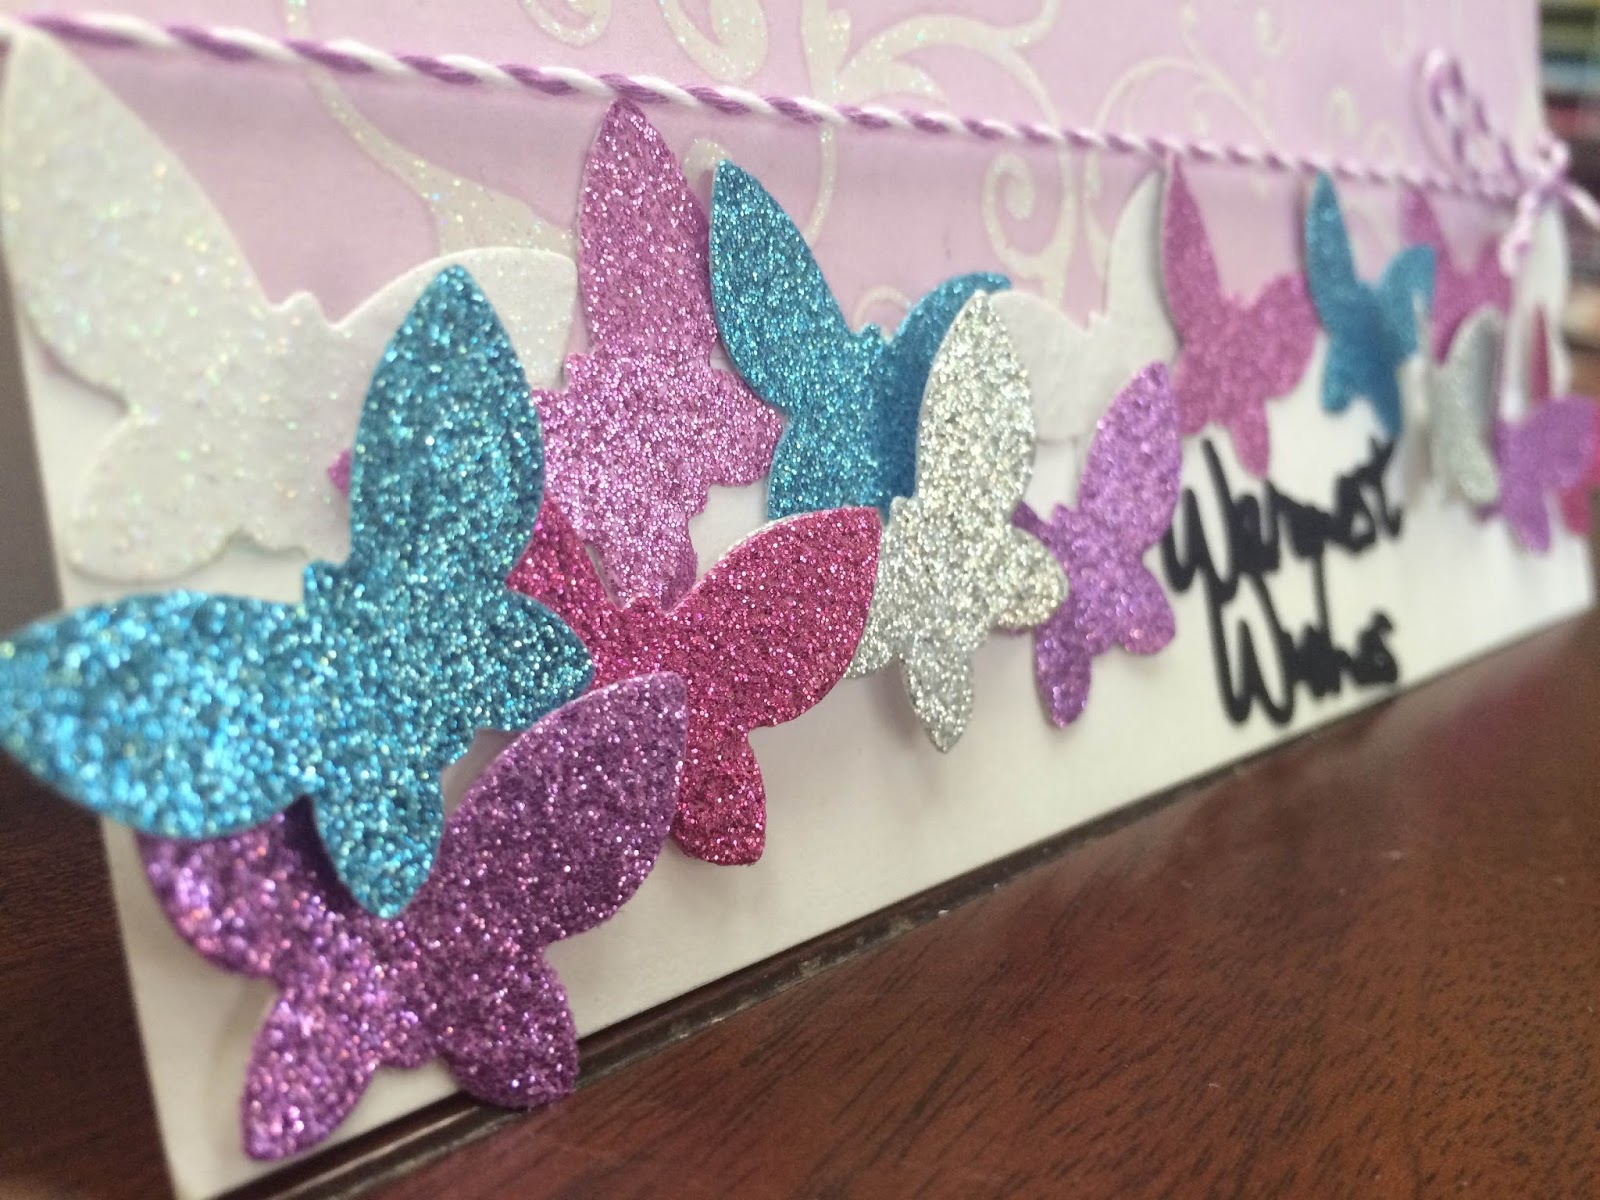
Friday Fun = Card making! smile emoticon We have created a"Warmest Wishes" card, great for any birthday! You can mix and match the colors to your liking. We carry 48 patterns in our Basic Glitter Paper(BGP 101-106, 201-224, and 401-409) ranging from swirls, dots, stars, vines, butterflies, scallops, diamonds, love letters, peonies, rose buds. Our Glitter Card Stock we carry 64 colors! All so sparkly and wont shed! Our Bakers Twine we carry 20 colors, these come in a fun popsicle shape. You can check out our products like this on our eBay and Etsy stoes! For wholesale buyers we have our WEBSITE and you can sign up to view our prices! :)

 
This is the supplies we used for our project. We started off with a white basic card stock for the card. We sized and cute the base of the card, (BGP101) Lilac. We used our Glue Tape runner in Permanent (GT001) to glue the base to the card. For the Butterflies i started off with our Glitter Card Stock in    Orchid(GCS002), Rose(GCS003), Sky Blue(GCS009), Silver(GCS012), White(GCS013), and Light Purple(GCS027). We die cut each one 3 times with a little butterfly die cut, using our Sizzix Big Shot. We used the Glue Tape (GT001) and our Foam Tape in Small Circles(FT002) to place the butterflies on the card and created a waterfall 3d border but making sure to leave space  for our phrase. Once finished with the butterflies we started on our phrase for the card. We used a basic black card stock, used our cricut and with the cartridge Wild Card. We used the phrase setting, selecting shift then pressing the "1". Make sure the correct phrase is in the little screen and once confirmed you can push cut. After the phrase is cut we glued it using the glue tape(GT001) and placed it in the space available. To finish off the card we added our Bakers Twine in Mauve(BT107). And this card was the final product of our project! Fun to make and great for a special someones birthday! :)


Comments

Popular posts from this blog

DIY TUTORIAL: Unicorn Headband

UNICORN  HEADBAND   Materials Best Creation Basic Glitter  Card Stock GCS065, GCS066,GCS067, GCS 048 Cardstock  white and with design Ribbon Tools Ruler Die Cut Round Glue Rotary Trimmer Step 1.   You can buy  a headband  and  cut  the Basic Glitter Card Stock GCS010   using the SVG file. You can cut using a cutting machine or with scissors.                                                                                                         Step 2   Cut the pink ribbon and make the bow.  Hold after until the glue is dry.   Step 3   Apply glue for the glitter paper and hold with the fabric until the glue is dry Step 4  Apply glue to the bow  and hold with a clothes pin to  the headband                                     You can decorate this project depending on the party theme. It can be used for birthday parties, baby showers, weddings, holidays and much more. It is important to use the Best Creation Basic Glitter cards

DIY: Under the Sea Invitation

DIY: Under the Sea Invitation Summer themed birthday parties and gatherings are always a fun way to bring friends and families together.  Get your guests rounded up with these cute Under the Sea themed invitations.  In this DIY Tutorial we use our glitter cardstock and glitter iron-on vinyl. Make sure to post your project with the hashtag #bestcreationDIY for a chance to be featured on our social media! Happy crafting! You can purchase materials for this project on our Etsy page here .    Materials Best Creation Basic Glitter  Card Stock GCS008. Glitter Iron  GIO12 (Ocean Blue) Cardstock  white and purple Purple Brad Tools Ruler Glue Iron Scissors, cutting machine, or dies Step 1 Cut  the Basic Glitter Card Stock GCS008 (Ocean Blue) using the SVG file. You can cut using a cutting machine or with scissors.  After cut 2 pieces of the regular purple cardstock. Cut the purple cardstock pieces slightly bigger than the SVG file. Step 2

It's our Mini Book Blog Hop Today......

How would you like to learn how to create a fun Mini Book  out of one 12x12 and be inspired to make 20 different versions of it?  Well get ready to hop- because today on each of our blogs we  will share with you some fun and creative different versions on how  to make  this simple mini book we did at the CHA Winter Show.  Here is the book and photos of the basic cuts to get you started  First cut your paper into thirds then fold each third in half and glue the pieces together to make 3 pages and now off you go  to our first designer on the hop Alicia Barry   to inspire you with more ideas and ways to embellish it and change it up for lots of different occasions. And... if you need some Amazing Adhesives to put it all  together be sure and grab some Helmar 450, some  Scrapdots  to pop it up and give it dimension  and  Helmar Craft glue too.   They work fantastic on our papers and all  of our designers love using it! Here is the links and order list just in case one is br