Today we are sharing some fantastic products from
Epiphany Crafts. We are so happy to get to partner with them, and we
are going to give you lots of ideas today from our design team
to show you how fun these little tools are to use with all of your projects.

The best thing we love about the Epiphany Crafts Shape Studio and Button Studio
line of tools is that it allows you to create your very own custom epoxy shapes
or acrylic buttons in just a few quick, easy steps. We love quick and easy!!
These little custom made buttons and epoxies can add the perfect detail to really
make your pages that much more special! And..... the best part about
them is you will never have to search for something to match again!
If you would like a chance to win the product above be sure and leave
a comment and we will announce one lucky winner this Saturday!!!!
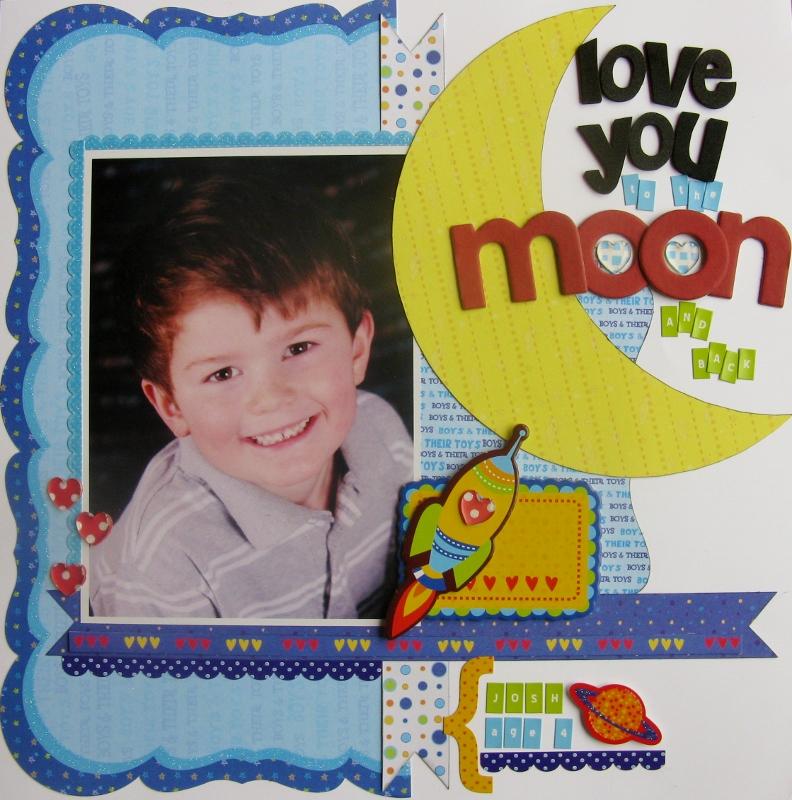 |
| "To the Moon and Back" by Jodi Wilton |


The Epiphany tool comes in lots of shapes
like these adorable little hearts too!!

Supplies: Cardstock: Bazill
like these adorable little hearts too!!
 |
| "At 5 "by Jona Panessa-Saavedra |

Supplies: Cardstock: Bazill
Best Creation Robot #R010, R009, R005, R004 /Robot Chipboard
Epiphany craft tool heart #5 and heart epoxy #25
Maya road pin, inkido star pin/ Brads: all about scrapbooking
She fussy cut the gears and puzzle pieces for layered embellishments.
 |
| "Radiant" by Tracey Taylor |

BP paper: Ballet Slippers BP007, Live Love Dance BP003,
On Your Toes BP002
BP Glitter Element Stickers BP012, BP Combo Stickers BP013
Glitter Cardstock Cornmeal GCS035, Trim by Prima
Letters by American Crafts, Flower by Pink Paislee
Epoxy, Tool by Epiphany Crafts, Helmar Premium Craft Glue
 |
| Card with a Ballet tag by Sandy Ang |


Sandy had a great idea to design her card so that
you can take the little tag off and use it to dress up
a special little dancers bag for class!!
Best Creation Supplies : stickers BP 012 and BP 013
expression chipboard BP 014, 6x6 glitter pad BP 016
Other Supplies : EC Button Studio BST-04, BSA-10
EC Vintage Settings Tea Room, Twine
 |
| "Ballet Princess" by Julie Walton |

The part we love the best about being able to make your own
buttons and things is that it always matches your project perfect!
Supplies
Best Creation papers - BP009, BP004, BP002, GCS027, BGP201;
Stickers, BP013, BP012; Mini papers
Epiphany Crafts - Round 20 button and Flower Button
Brads - Creative Imaginations/ Pearls - Darice /Button - Doodlebug
Pearl Trim - stash/Pen - Gel Writer/Ink - Colorbox
 |
| "My Princess" by Nicole Wise |

BGP208, BP010, BP012, BP016, Best Creation Foam Tape Squares,
Epiphany Crafts Button Studio and Buttons (Round 14),
Thickers, Recollections Flowers, Embroidery Floss,
Spellbinders Shapeabilities Butterfly Die,
Fiskars Border Punch, Zva Creative Bling Swirl

 |
| Birthday Bag by Tina McDonald |

Robot Paper gift bag supplies:
Red and blue Glitter cardstock
Robot papers R007, R006, R005
Robot glitter element stickers R 012, R013
Spellbinders Nested Pennants (S5-028)
and Nested Lacey Pennants (S5-029)
Helmar Adhesives, Epiphany Epoxy, Ribbon
 |
| Queen for a Day by Kim Arledge |
Be sure and check out the Epiphany Craft Website and
see all the great projects from their designers!
You are really going to love this product!
Have a great day everyone
and be sure and check back Saturday for
the winners of the blog hop.....
Those projects are all so awesome! LOVE the button maker, that would be so cool!!!
ReplyDeleteLoved the new tool, it is really cool!
ReplyDeleteLove these projects! Great giveaway!
ReplyDeleteCool new tool. The projects are gorgeous as always. Much swooning from this side of the pond :)
ReplyDeleteLove the projects. What a great tool! It would be a perfect way to use some of my scraps, too!
ReplyDeleteWhat an AWESOME tool! I LOVE It! The layouts the ladies created are A-freakin'-Mazing!
ReplyDeleteSuper cute projects! Cool product too!!
ReplyDeleteNeat tool! I wish I can have one, just one basic one will do.
ReplyDeleteThanks for the inspiring projects.
I love this tool! So versatile! All the DT projects are awesome, especially the 'To the Moon and Back' layout! *ADORE*
ReplyDeleteThis tool looks lke a lot of fun! Great projects by the DT!
ReplyDeleteI'm wanting one of these tools so bad but they are sold out everywhere...I loved to win one. I love the button in the middle of the flower..so cute.
ReplyDeleteGreat projects, love the button flower centres. Would love to win one of these fab tools!
ReplyDeleteYour paper is so adorable... Will work well with Ephiphany for sure
ReplyDeleteI was watching their blog to see what it does incredible.. Pick mememememememe
ReplyDeleteThe button maker is amazing. Thanks for the chance to win
ReplyDeletethe tool is cool along with your papers win win
ReplyDeleteGreat projects everyone!!! My fav is Jona's! LOVE it!!!!
ReplyDeleteHow cute is this....what an amazing tool.
ReplyDeleteI would love to win that new tool how cool is that... wow
ReplyDeleteI love embellies and every kind of crafting tool. This looks like such fun!
ReplyDeleteWhat a great tool to have to match everything you need.
ReplyDeleteI am loving epiphany crafts!!!
ReplyDeletei heart epiphany crafts!! :O) thank you for the chance to win an awesome prize!! have a great weekend!
ReplyDeleteWow! Thanks for introducing me to epiphany crafts! I have never heard of this company. These products look GREAT! Love buttons and I love to have matching embellishments!!!!
ReplyDeleteWhat an AWESOME tool! I love all the possibilities for this tool & will definately be adding it to my "want" list. The DT outdid themselves with their layouts & projects. TFS!
ReplyDeleteI knew this tool could be used to make buttons, but didn't know about the acrylic shapes. How fun! Yes, please!
ReplyDelete