
A Sneek Peak at Christmas


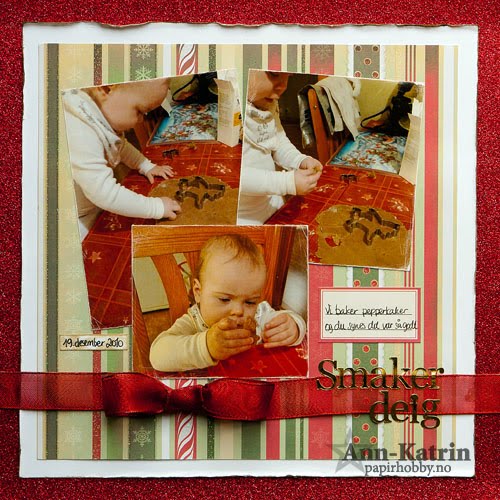
designer: Ann- Katrin


Our favorite memories of Christmas
are so special and putting them on a page and
remembering them each year makes it even more fun because
looking back gets us even more excited for the next Christmas to come!
so with that in mind we would like to share with you

that we have beautiful collections of glittery and embossed
Holiday memories and parties all the more special!

Today our designers shared some of their special Christmas moments
with you of their holidays and we even shared
a few creative ways to do trees on your pages!


designer: Tracey Taylor

Tracey layered lots of our papers for her layout and added
ribbons, lace edging and even some glittery beads to
to remember this fun photo day of her little Santa baby :)


designer: Petra Offrell

Petra created her page by using a plain white piece
of cardstock and layering different pieces of our
Christmas papers. She added a super creative tree
and has given us the tutorial so that you can do this too!


First cut the paper in strips with a punch


then cut apart the strips into tiny pieces that you
will layer. Starting at the bottom and then going up
and in to the top, you can create this beautiful tree for your page!


designer: Debbie Fitzgerald
saving a photo of your child and putting their christmas list
is a wonderful idea to remember the things they
wished and fun to look back on in the future...

designer: Julie Walton


Julie also created this fun layered layout with lots of
foam pop dots, a cute banner and this cute tree that
she cut and fringed and layered. Our glitter
cardstock worked great for this page and all the shiny
colors and glitz put you right in the spirit!


designer: Kim Holmes

This layout of taking pictures with Santa is absolutely adorable!
She cut out lots of circles, trees and presents and popped them up
and created the perfect scene for this photo!
And the perfect title don't you think?


Hope this gets you going in the Holiday Spirit
and don't forget to leave a comment for the glitter dots!
Today is the last day!

http://www.bestcreationinc.blogspot.com/

Comments

  1. Oh my goodness, that tree idea is super!! Lots of work, but what an effect! You are SO putting me in the spirit!

    ReplyDelete
  2. These pages are putting me in the Christmas mood!

    ReplyDelete

Post a Comment

Popular posts from this blog

DIY TUTORIAL: Unicorn Headband

UNICORN  HEADBAND   Materials Best Creation Basic Glitter  Card Stock GCS065, GCS066,GCS067, GCS 048 Cardstock  white and with design Ribbon Tools Ruler Die Cut Round Glue Rotary Trimmer Step 1.   You can buy  a headband  and  cut  the Basic Glitter Card Stock GCS010   using the SVG file. You can cut using a cutting machine or with scissors.                                                                                                         Step 2   Cut the pink ribbon and make the bow.  Hold after until the glue is dry.   Step 3   Apply glue for the glitter paper and hold with the fabric until the glue is dry Step 4  Apply glue to the bow  and hold with a clothes pin to  the headband                                     You can decorate this project depending on the party theme. It can be used for birthday parties, baby showers, weddings, holidays and much more. It is important to use the Best Creation Basic Glitter cards

DIY: Under the Sea Invitation

DIY: Under the Sea Invitation Summer themed birthday parties and gatherings are always a fun way to bring friends and families together.  Get your guests rounded up with these cute Under the Sea themed invitations.  In this DIY Tutorial we use our glitter cardstock and glitter iron-on vinyl. Make sure to post your project with the hashtag #bestcreationDIY for a chance to be featured on our social media! Happy crafting! You can purchase materials for this project on our Etsy page here .    Materials Best Creation Basic Glitter  Card Stock GCS008. Glitter Iron  GIO12 (Ocean Blue) Cardstock  white and purple Purple Brad Tools Ruler Glue Iron Scissors, cutting machine, or dies Step 1 Cut  the Basic Glitter Card Stock GCS008 (Ocean Blue) using the SVG file. You can cut using a cutting machine or with scissors.  After cut 2 pieces of the regular purple cardstock. Cut the purple cardstock pieces slightly bigger than the SVG file. Step 2

It's our Mini Book Blog Hop Today......

How would you like to learn how to create a fun Mini Book  out of one 12x12 and be inspired to make 20 different versions of it?  Well get ready to hop- because today on each of our blogs we  will share with you some fun and creative different versions on how  to make  this simple mini book we did at the CHA Winter Show.  Here is the book and photos of the basic cuts to get you started  First cut your paper into thirds then fold each third in half and glue the pieces together to make 3 pages and now off you go  to our first designer on the hop Alicia Barry   to inspire you with more ideas and ways to embellish it and change it up for lots of different occasions. And... if you need some Amazing Adhesives to put it all  together be sure and grab some Helmar 450, some  Scrapdots  to pop it up and give it dimension  and  Helmar Craft glue too.   They work fantastic on our papers and all  of our designers love using it! Here is the links and order list just in case one is br