
Mix and Match Friday!

Today is mix and match Friday and we've got some great ways to decorate your living spaces for the new season! Get out your scraps from last Fall and mix things up with some new products from Best Creation!

We'll be using Hello Fall


And Autumn Splendor!


 Decorative Candle Holders by Sandy Ang
Products used: Best Creation's Autumn Splendor ESG003, Card Making Stickers CMS051, Metal Style Stickers MSS039, MSS040, MSS041, MSS042, Maple Treehouse ribbons, Mason jars, votive candle holders


Wouldn't these decorative candle holders look lovely on the Thanksgiving table? They are super easy to make. Just layer stickers from a variety of our Autumn collections on to mason jars, tie on a couple of ribbons around the neck and add a votive candle holder on top!


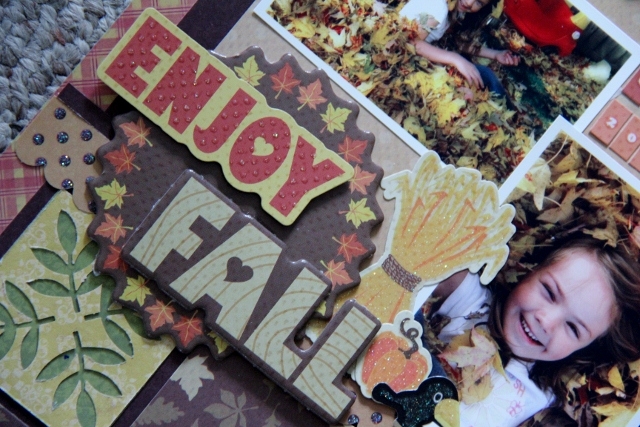
Enjoy Fall by Jodi Wilton
Products used: Best Creation's Hello Fall HF006, HF004, HF008, HF013, HF012, HF014, Autumn Splendor GP417, EC003, Basic Glitter Paper BGP223, Foam Tape, Other Supplies: MS Punch


 Jodi used a punch to punch out leaves out of squares to create a pattern. She glued this onto the same size square in a different color, to let the leaves really pop!


Fall Magnetic Frame by Julie Walton
Products used: Best Creation's Hello Fall 6x6 pad HF016, Glitter Cardstock GCS005

 This Frame holds a 4x6 photo and is the perfect accent to your fridge or office cabinet!


Wall Hanging by Debbie Sherman
Products used: Best Creation's Basic GlitterPaper BGP214, Hello Fall HF002, HF003, HF011, Chipboard Letters GCB009, Autumn Splendor ESC003


I found out Thanksgiving is going to be at my house this year, so I thought I better get busy coming up with ideas for decorations!
-Gini
Blackboard Menu by Gini Williams Cagle
Products used: Best Creation's Hello Fall HF004,010, Chipboard Letters CBA001


Gini fussy cut the center of the die cut away, leaving a frame. She glued the frame to a heavy piece of cardboard that had been sprayed with Chalkboard paint. She then added a couple of rosettes and some rustic ribbon, and had a cute blackboard that she can write her Thanksgiving menu on!


 Pumpkin Place Card by Gini Williams Cagle
 Products used: Best Creation's Hello Fall HF001, 003, 013, CS030, CBA003
 For this little 3-d pumpkin, Gini cut 5 strips of paper 1" x 12", backed them with the glitter cardstock, and joined them in the center with a brad. She fanned them out evenly, and attached the tops together to form the pumpkin.

Pumpkin Place Setting
What a perfect and festive way to decorate your table!

Check back with us next week for some BRAND NEW collections from Best Creation!

Comments

  1. Love the ideas, very inspiring! :) The DT is doing a fabulous job!

    ReplyDelete
  2. Love the projects in this post. Excellent!

    ReplyDelete

Post a Comment

Popular posts from this blog

DIY TUTORIAL: Unicorn Headband

UNICORN  HEADBAND   Materials Best Creation Basic Glitter  Card Stock GCS065, GCS066,GCS067, GCS 048 Cardstock  white and with design Ribbon Tools Ruler Die Cut Round Glue Rotary Trimmer Step 1.   You can buy  a headband  and  cut  the Basic Glitter Card Stock GCS010   using the SVG file. You can cut using a cutting machine or with scissors.                                                                                                         Step 2   Cut the pink ribbon and make the bow.  Hold after until the glue is dry.   Step 3   Apply glue for the glitter paper and hold with the fabric until the glue is dry Step 4  Apply glue to the bow  and hold with a clothes pin to  the headband                                     You can decorate this project depending on the party theme. It can be used for birthday parties, baby showers, weddings, holidays and much more. It is important to use the Best Creation Basic Glitter cards

DIY: Under the Sea Invitation

DIY: Under the Sea Invitation Summer themed birthday parties and gatherings are always a fun way to bring friends and families together.  Get your guests rounded up with these cute Under the Sea themed invitations.  In this DIY Tutorial we use our glitter cardstock and glitter iron-on vinyl. Make sure to post your project with the hashtag #bestcreationDIY for a chance to be featured on our social media! Happy crafting! You can purchase materials for this project on our Etsy page here .    Materials Best Creation Basic Glitter  Card Stock GCS008. Glitter Iron  GIO12 (Ocean Blue) Cardstock  white and purple Purple Brad Tools Ruler Glue Iron Scissors, cutting machine, or dies Step 1 Cut  the Basic Glitter Card Stock GCS008 (Ocean Blue) using the SVG file. You can cut using a cutting machine or with scissors.  After cut 2 pieces of the regular purple cardstock. Cut the purple cardstock pieces slightly bigger than the SVG file. Step 2

It's our Mini Book Blog Hop Today......

How would you like to learn how to create a fun Mini Book  out of one 12x12 and be inspired to make 20 different versions of it?  Well get ready to hop- because today on each of our blogs we  will share with you some fun and creative different versions on how  to make  this simple mini book we did at the CHA Winter Show.  Here is the book and photos of the basic cuts to get you started  First cut your paper into thirds then fold each third in half and glue the pieces together to make 3 pages and now off you go  to our first designer on the hop Alicia Barry   to inspire you with more ideas and ways to embellish it and change it up for lots of different occasions. And... if you need some Amazing Adhesives to put it all  together be sure and grab some Helmar 450, some  Scrapdots  to pop it up and give it dimension  and  Helmar Craft glue too.   They work fantastic on our papers and all  of our designers love using it! Here is the links and order list just in case one is br